In Part I I tried to explain a bit on what the DI Container is and how you use it.
When building an infrastructure you need to be aware of changes and thus, flexibility should be taken into consideration.
The DI Container gives us that flexibility as we are bound to the interface but not to the implementation.
In the third part I’ll talk about how we made a Visual Studio template for ease of use but to do so, we wanted the “base Microservice” to be as thin as possible keeping it as flexible as possible.
We’ve already separated the different common modules to separate libraries (like the “IDataReceiver” example) so why don’t we take it a step further? Nuget it!
It is very simple to create your own local nuget server and use it in Visual Studio. Azure DevOps Artifacts is exactly that. This way we can make the separation of the pyramid layers more flexible and maintaining different versions of the same nuget package allows the developers to update their MS at their own time without breaking anything.
Making the libraries Nugets instead of included projects has pros and cons.
Pros:
- You have only one codebase to maintain.
- Changes to the common libraries will be done in only one place (and then updated via nuget) instead of rewriting it in every module.
Cons:
- Debugging the libraries becomes more complicated – but don’t worry, we have a solution for this as well!
Creating a Nuget is very simple. Download the nuget.exe and run
nuget pack
using the CMD at the project directory (where the .csproj) is, then run
nuget.exe push -source \\mycompany\repo\ mypackage.1.0.0.nupkg
to push the package to your local repo.
We added this to our build pipeline, so every merge to Master creates a new nuget package and it’s immediately available for everyone to update.
How we fixed the debugging issue
Debugging code that isn’t yours it’s not easy but not impossible.
We created a Symbols Server (server == a directory in a shared storage). When pushing the nuget packages to the local repo, we also push the symbols to that directory. We then configured VS to look for the debugging symbols in that location and suddenly we could debug the nuget code as our own! Awesome!
How to do that?
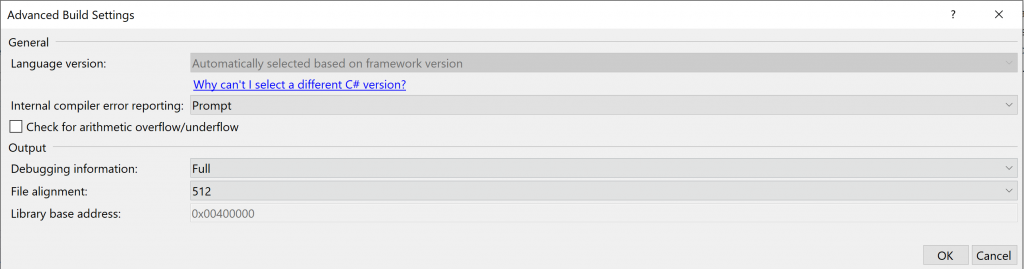
First, you need to configure your C# projects to export the build symbols. Under the project properties -> Build -> Advanced, change the “Debugging information” to “Full”. (Change it later for production to pdb-only).
Then you can add to the build pipeline to export the symbols to a remote directory.
Now you just need to configure VS to look into that directory when debugging.
Go to options -> Debugging -> Symbols
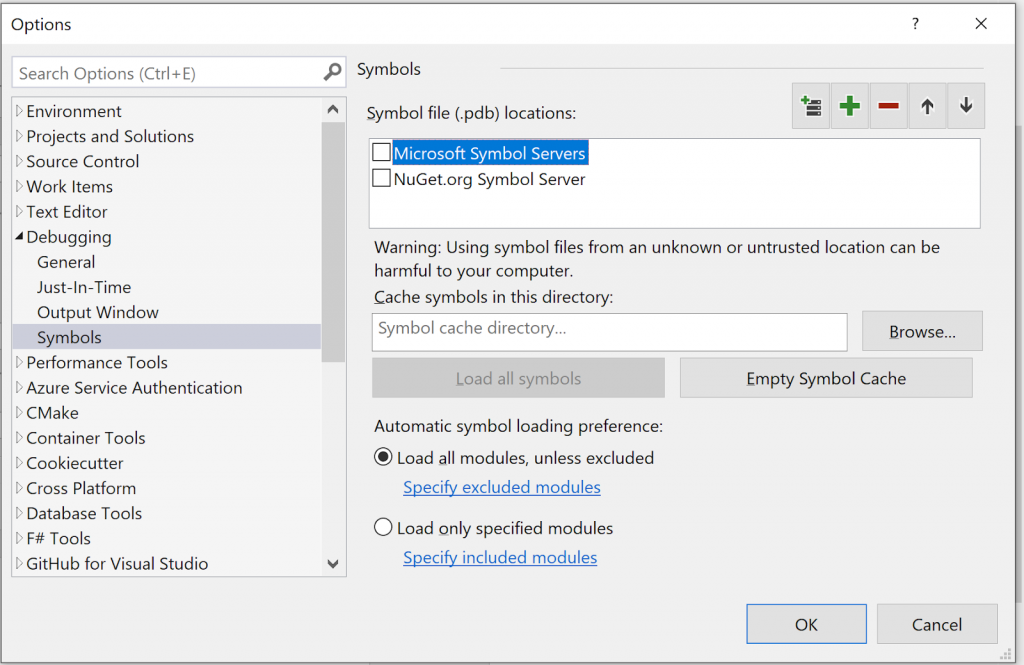
Click on the green “+” on the top-right corner and add the symbol’s directory. That’s it!
I was part of a legacy project that when the code was pulled it didn’t compiled as it needed some libraries that weren’t included in the repo. I was able to find those libraries in the computer of a co-worker and had to copy-paste them to my computer. Using a local nuget server is the solution to this issue.
Moreover, each package pushed has a version and that version is the git-tag for the commit. This makes it very easy to see what exactly is included in the package.
This phase allows the pyramid to be agile and flexible, both the first and second layer of our architecture is built with nuget packages.
In the next chapter, we’ll see how to create a Visual Studio project template, allowing all the projects to be automatically created on top of the pyramid layers.
Comments: 2
[…] that we know how to use the .Net Core Dependency Injection Framework and how to nuget our code (and even configure a symbols server), we can move to the last part of our infrastructure – […]
[…] the best way to manage its code is in different repos. Cross project libraries were consumed using Nuget packaging. Everything works automatically, we have CI pipelines for the Nuget packages, for integration […]