This is part I on how we built the infrastructure.
Using the built-in .Net Core DI Container makes the separation of the pyramid layers easier. After getting used to it, it’s even easier to read and understand than most of the code I red.
This is important for our infrastructure as it gives the programmer the freedom to implement the different parts as he needs, providing him a good base to the MS.
.Net Core DI Container
I first heard of this in Jeremy Bytes’ talk about Dependency Injection last year and, quite frankly, I didn’t understand when I would use it.
Dependency Injection is a technique in which the class receives other objects it dependes on. – Wikipedia
We all use DI even if we don’t intend to. Receiving parameters in the constructor is a type of DI. A function that receives parameters is also a type of DI.
When recognizing the usage of DI, the software can become more flexible without losing its simplicity, and that’t the beauty I see in it.
The DI container is a framework that lets you manage all the dependencies you have. It’s purpose is to manage the life cycle of all the modules and distribute them to the consumers. A side-effect of it is that it lets you see, like a cookbook, all the “ingredients” your software has and the “recipe”. Another advantage is that you let the framework do the job of “singletonning” and “scoping” the implementations of the required interfaces.
.Net Core did not invent this. There were frameworks for DI Containers long before .Net Core came to the world and it’s way beyond C#. Almost every OOP (Object Oriented Programming) language has a DI Container framework.
For example, for C# there is also Ninject and Autofact (among others). In Java you can use Spring or Guice. And even C++ has it’s DI Containers frameworks: Boost.DI and Kangaru. There are many more options, these are the most popular for each language.
When starting a new Service Worker Project (C# .Net Core) in Visual Studio you receive two classes: Worker and Program.
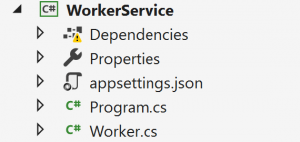
Worker is where you should write your logic.
Program is where the DI magic happens – This is the “recipe” part.
In Program you’ll see a lambda function that has a “services” parameter, this is the DI Container.
One of the lines in this files should be:
services.AddHostedService<Worker>();
This line tells the container to be aware of the class “Worker” and flag it as a “HostedService”. This will tell the DI Container how to run this class later on.
Let’s look at the Worker class, you can see it receives an ILogger instance in the constructor – but who calls the constructor and where does that ILogger comes from?! Well, that’s the magic of the DI container Microsoft gives you.
When calling Build() on the HostBuilder, the DI Container will try to create this object according to the parameters in it’s builder. You can see the Build() function being called in the Main() function.
public static void Main(string[] args)
{
    CreateHostBuilder(args).Build().Run();
}
On Run(), the framework will call the function “ExecuteAsync” of your worker (you can also override StartAsync and StopAsync for more flexibility).
The ILogger interface is implemented by the framework and it is given to you for free! Another example is the IConfiguration interface that you can add to your constructor (without changing anything else) to get configuration values from the appsettings.json file.
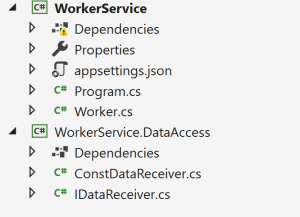
Now let’s say you want to add a service to your project responsible for getting data from some external source.
Let’s add a new library project to the solution (.Net Standard) and add an interface to it “IDataReceiver”.
Now let’s add a simple implementation of that interface that returns constant data – “ConstDataReceiver : IDataReceiver”.
To connect the new interface to its implementation and into your Worker you simply need to “Declare” it and to “Consume” it.
“Declare”: Add this line
services.AddSingleton<IDataReceiver, ConstDataReceiver>();
before the “..AddHostedService..” line. This will tell the container that each time someone requests the interface IDataReceiver it should give it an instance of ConstDataReceiver. As we asked to AddSingleton this pair, the same instance of ConstDataReceiver will be delivered to every consumer.
“Consume”: Add “IDataReceiver” parameter to the constructor of your Worker. This will tell the container, when processing the Build() request, that Worker requires the IDataReceiver implementation.
That’s it! Now we have a background worker that can Log and use external data provided by the IDataReceiver implementation.
Next we’ll talk about the nuget part of the infrastructure.
Obviously, there is a lot more stuff that can be done and a lot of good sources on the web for it. I think that understanding this is the key to continue understanding and using the DI Container.
Comments: 3
[…] Let’s start our journey with Part I – The .Net Core DI Container. […]
[…] Part I I tried to explain a bit on what the DI Container is and how you use […]
[…] that we know how to use the .Net Core Dependency Injection Framework and how to nuget our code (and even configure a symbols server), we can move to the last part of […]