DateTime.AfterPost - DateTime.Now = 3 minutes

Chipa
A quick and easy recipe for making Chipa (Cheese Bread)
Equipment
- Oven
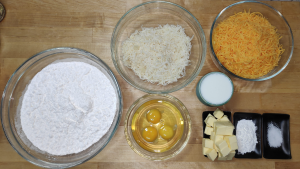
Ingredients
- 500 gr Tapioca Flour You’ll probably find this in some nature stores
- 250 gr Cheddar Cheese Grated
- 150 gr Parmesan Cheese Grated
- 100 ml Milk
- 10 gr Baking Powder
- 3 units Eggs
- 150 gr Butter In room temperature
- 1 tbsp Salt
Instructions
- Prepare all your ingredients

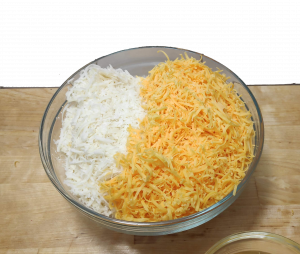
- Mix the flour with the cheeses and the salt in a large container

- In a separate bowl, mix the milk, eggs and baking powder.

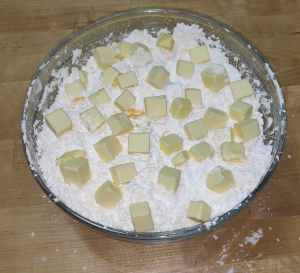
- Cut the butter into small cubes and add it to the flour mix.

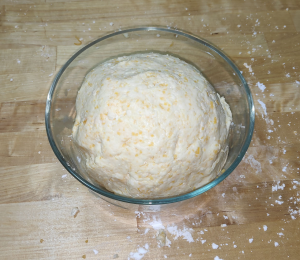
- Mix everything together until its almost unified.
- Make a hole in the center of the flour mix and add the milk mix into it.

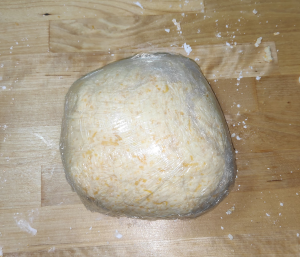
- With your hands, mix the whole thing until you get a solid mixture. You should see chunks of cheese in the mixture.

- Wrap it in plastic wrap and let it rest in the refrigerator for 30 minutes.

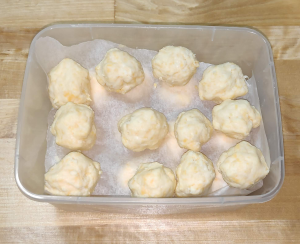
- Take it from the refrigerator and make small balls out of the mixture, the size of a two-bites ball (a bit smaller than a ping-pong ball).

- You can keep some of the balls in the freezer for 1-2 months and they’ll taste as if you just made them.The ones you do want to cook now will go to the freezer for about 5 minutes, this way they’ll get a crunchy taste.

- In the meanwhile start your oven at 250 degrees. Use some baking paper so the balls don’t stick and put them into the oven.
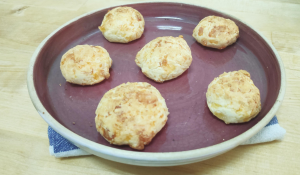
- After 10-15 minutes they should look like in the picture.Eat while it’s hot!


Notes
In the video she uses different kinds of cheese instead of the Cheddar cheese, I couldn’t find them where I live, but the taste is still very good, so Cheddar cheese it is.
Comments: 2
The asado and the picada are inseparable. It’s like washing your teeth without toothpaste, it can be done but you know something is missing.
Couldn’t have said that better.