As I mentioned, last month I got married to the woman I love.
When we started planning the wedding, I thought about creating a website with some information about the wedding and inserting a QR into the invitation. You know, to add a bit of technology (a personal touch, you may say) to the wedding.
Then we began to think of all the different services we’ll need and what’s important to us more and what’s less. I thought that everything the invitees receive should be of utmost quality. For example, the DJ, the facilities and, obviously, the food. Those service providers are the ones I had more interest in. And then we thought about the communication with the invitees:
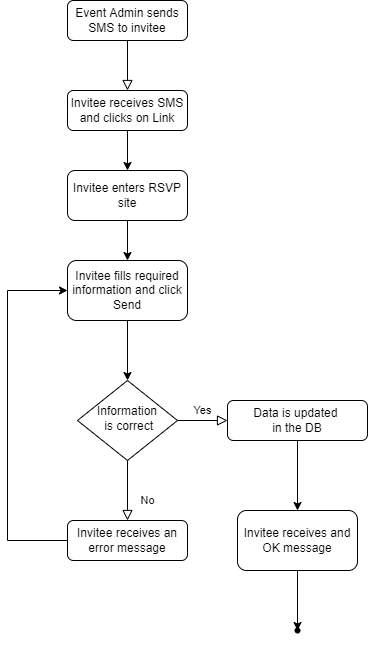
I don’t know how it works wherever you live, but here we send SMSs to the invitees two weeks before the wedding for them to RSVP. This way we can tell the catering, bar, DJ and such exactly how many people will come to prepare themself.
There are many services that give you this functionality and what I learned is that they all charge you by quantity of messages. I thought to myself; I have an unlimited SMS plan, why would I deny myself from sending messages to all the invitees how many times I want? It was at this moment I decided I’ll make Happroovy.

Happroovy
A RSVP system for events.
It is made of four separate parts: A DB, a Backend Server, an Application and a Website. I’ll describe all of them in this post, what they do, where they are hosted and how much it costs me
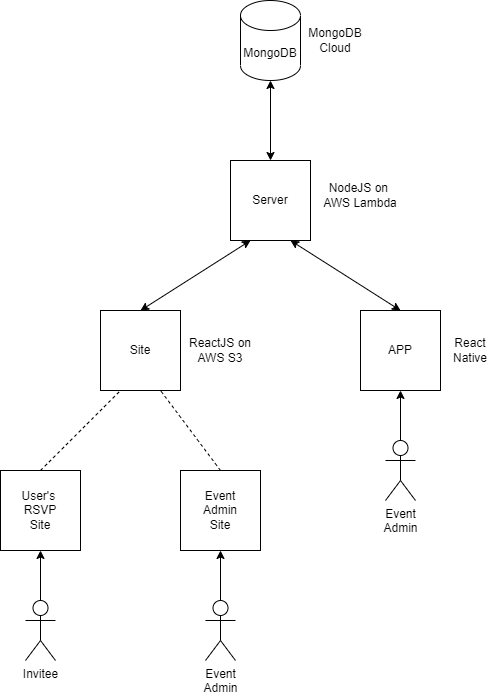
The System Modules
The DB
I knew I’ll make up with react, react-native and such, so I thought to myself a no-SQL will serve me better. I wanted the flexibility of it as I was going to make the system a bit fast without a lot of thinking (not the best way, but I wanted to feel the system in my hands a bit to better understand it). So I went to my old friend MongoDB. The database is hosted using MongoDB cloud under AWS free tier. It’s more than enough for what I need, so this part is free.
- Technology: MongoDB
- Hosted on: MongoDB Cloud
- Price: Free
The App
Here in Israel, most of the mobile plans have unlimited calls and unlimited SMS messages and that’s what I wanted to take advantage of. I thought that if I make an App that through it the user will send the messages, it will give them the absolute control of how many messages they want to send. The service I was gonna give (and at this point I started to think about publishing the system for everyone to use) would have a fixed price for each event without any limitations on the number of messages you send. As I was creating the whole thing using Javascript, I decided the best way to make the App was using React Native. Moreover, this gave me the option for cross-device seamlessly.
- Technology: React Native
- Hosted on: The user’s mobile (only tested on Android so far)
- Price: Free
The Site
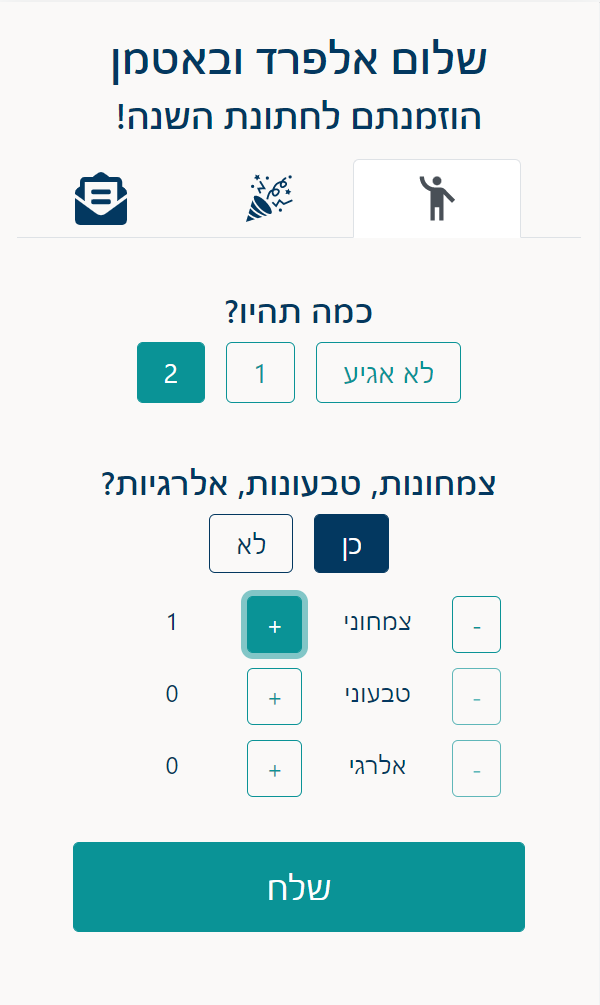
The site has two purposes. The first, is the UI where the invitees respond to their RSVP and can see details about the event. The second is for the event administrator to manage the event: Edit the details and manage the invitees.
It was crucial for me to really work on the UI/UX of the RSVP site, to make it as easy and intuitive as possible giving as much information as I could without “drowning” the user with it.
When an invitee is added to an event, it is given an UID (Unique Identifier) which is used in the link the invitee receives to identify them. This way the invitees don’t need to sign up or anything and it’s pretty difficult for an attacker to receive all the invitees’ information (as the attacker will need to brute force a 16 bytes string – 2^128 options).
You can see an example here: https://happroovy.com/rsvp/d4d55404-a989-4ba3-a4b7-597de10e31a8 (It’s in Hebrew, sorry).
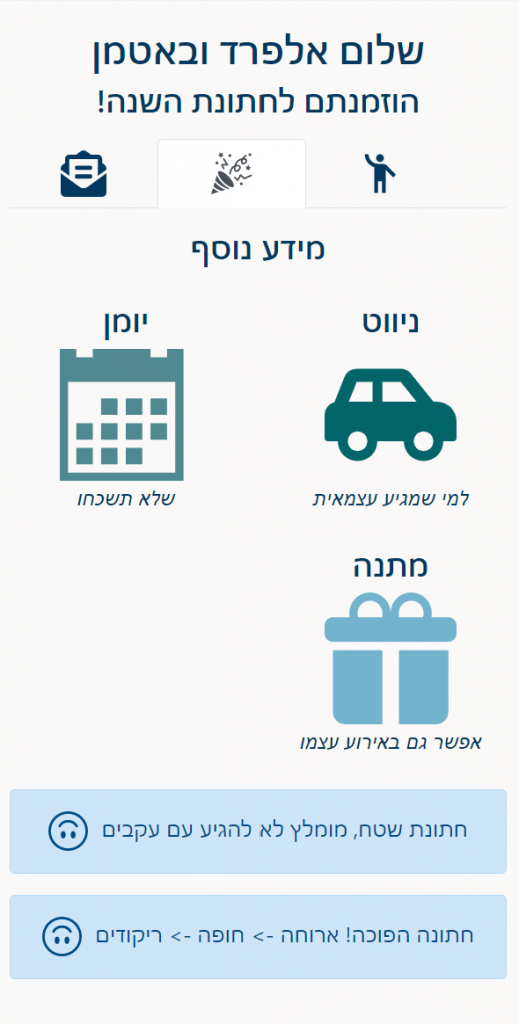
The invitees can enter their link as many times as they want to either to update their RSVP or just to see the details of the wedding. In the site they can see the schedule for the event, navigation information, shuttles and more.
Here is an example of the RSVP flow:
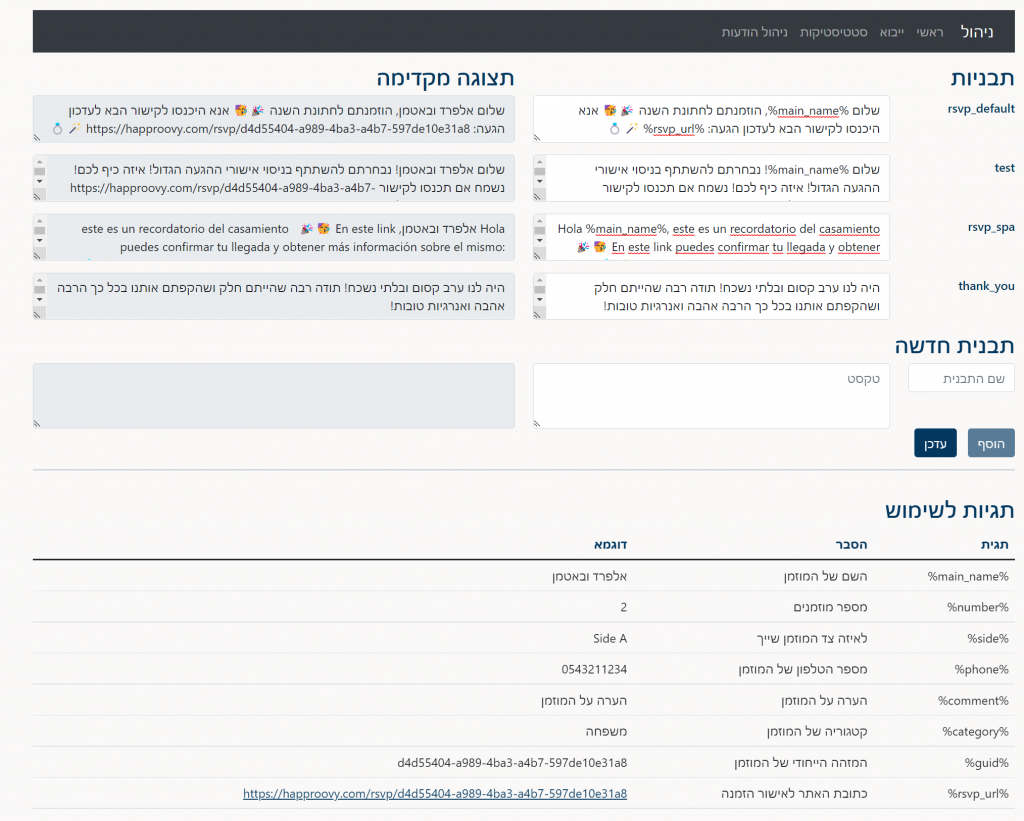
The event admin controls everything the invitees sees: Gift link, Shuttle link, Navigation link, an Invitation image, how many participants this invitee can bring (+1? +2? And such), do they need to respond about children? Do they need to respond about food limitations? What SMS messages to send (with templated information) and such. Everything is manageable from the Administration page in the site. They can see statistics about the invitees, can manage the SMS messages that will be sent and see the list of invitees and edit them.
One of the latest features I added was a notification system that allows the event manager to receive notifications on new RSVPs.
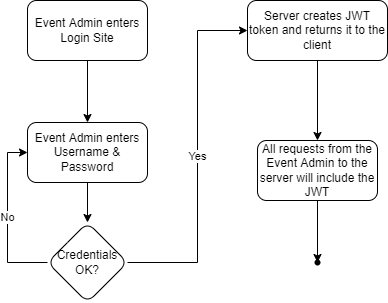
The login flows looks like this:
This is what the invitees see when they enter the link:
This is the SMS Management page for the event admin:
- Technology: ReactJS
- Hosted on: AWS Bucket
- Price: A few cents per month
The Backend Server
The backend is responsible for the communication between the App & the Site to and from the DB. It has two roles; authentication service and data service.
The authentication is made using a simple username & password mechanism (I have a backlog feature to turn this into a “real” authentication mechanism) and currently only I can make “event admins”. The authentication is only for the Event Admin as the invitees don’t need to.
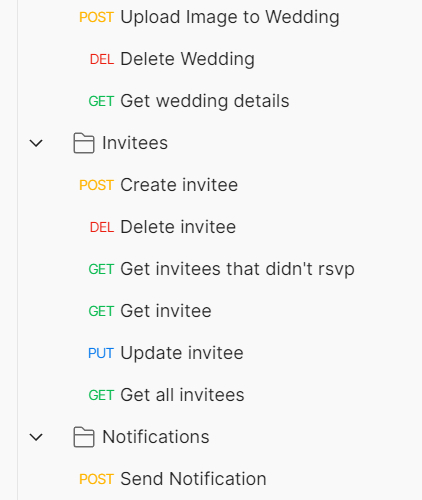
The data service is a simple~complicated CRUD-like service that manages the events, the invitees and the authenticated users.
- Technology: Node.JS
- Hosted on: AWS Lambda
- Price: a few cents per month if it is used.
Happroovy <3 AWS
AWS Infrastructure
Using AWS as my infrastructure allowed me to:
- Deploy everything pretty fast and only pay for what I’m using and
- Get more practice with AWS cloud services to pass my Developer’s certificate.
It was a win-win situation for me.
I chose AWS because I’m already familiar with it but I’m sure Azure and GCP would have been good replacements as well.
AWS Static pages using Buckets
AWS Buckets have a very nice feature that they can be turned into Static Websites. It’s a simple checkbox and a textbox to indicate where your index.html can be found and that’s it.
This way I could build the ReactJS site into a static website (npm run build) and upload it to the bucket (aws s3 sync build/ s3://happroovy.com). The site is up in seconds. There are two things you need to know: 1. The name of the bucket should be the name of your domain (thus, my Bucket’s name is happroovy.com). 2. It doesn’t support SSL (https) directly, so I had to use other services to add my SSL certificate to the Bucket ().
Very easily I have constructed a very simple deploy script
npm run build & aws s3 sync build/ s3://happroovy.com
I have a deploy mechanism that takes seconds and it is very intuitive.
Lambda as a backend server
Yes! I used Lambda to run my Node.js server! It’s pretty much free as you have a free tier of 1,000,000 invocations per month and you don’t pay if you don’t use it. It does take a few seconds (2-3) when running it the “first” time, but if many users are working with it, then the Lambda keeps warm and it’s faster.
I used serverless to ease this. It allows you, with the help of a very simple YAML file, to create the API Gateway and connect it with the Lambda:
service: happroovy
variablesResolutionMode: 20210326
plugins:
  - serverless-express
  # - serverless-dotenv-plugin
provider:
  name: aws
  runtime: nodejs14.x
  memorySize: 128
  timeout: 30
  stage: production
  region: us-east-1
  lambdaHashingVersion: 20201221
  apiGateway:
    binaryMediaTypes:
      - 'images/*'
functions:
  api:
    handler: index.handler
    environment:
      CONNECTION_STRING: ${ssm:/happroovy_connection_string}
      TOKEN_KEY: ${ssm:/happroovy_token_key}
      PORT: ${ssm:/happroovy_port}
      LOG_LEVEL: info
    events:
      - http:
          method: ANY
          path: /
          cors:
            origin: 'https://happroovy.com'
            headers:
              - Content-Type
              - X-Amz-Date
              - Authorization
              - X-Api-Key
              - X-Amz-Security-Token
              - X-Amz-User-Agent
              - x-access-token
      - http:
          path: /{proxy+}
          method: ANY
          cors:
            origin: 'https://happroovy.com' # <-- Specify allowed origin
            headers: # <-- Specify allowed headers
              - Content-Type
              - X-Amz-Date
              - Authorization
              - X-Api-Key
              - X-Amz-Security-Token
              - X-Amz-User-Agent
              - x-access-token
The Domain
I used AWS’ Route53 to buy my domain and it makes it very simple to connect the domain to other AWS services. The price is pretty much the same everywhere (12 dollars per year)
The Code
The code for the system is currently private but I am thinking of making it open source. It is private for now mostly because it isn’t very pretty 🙂
I work with Jira for this project and the code is in BitBucket. I tried to force myself to work using Backlog Items cards to be more arranged and it worked well for me. Especially because in this project I had a lot of ideas and cool features to add and knowing myself I would have never ended. I decided on what features are necessary for the MVP and stick to them. Any other feature I would come up with while programming, I would write it down in Jira for another version.
The Tests
Yes, I did tests. Not as much as I wanted but there are a few important tests I run. The tests are especially for the server and I run them using Postman. I have a collection in Postman with 20-30 tests that I can run automatically wherever I want. They use environment variables so that I can login once and they use the same token for all the calls. Very cool. Moreover, Postman has a “Test” feature which I can tell it what to expect from the response, so I’m really checking the server.
Test example:
pm.test("Create invitee - Status code is 200", function () {
    pm.response.to.have.status(200);
});
pm.test("Create invitee - Test correct wedding", function () {
    pm.expect(data.wedding).to.eql(current_wedding);
});
Summary
The total cost for the system will increase only if people actually use the system. Whilst idle, the system costs me 0.64 cents per month.
I still have a very large Backlog to work on and I hope I will keep working on this and letting other people use it. The MVP is ready and it’s working pretty well. I’m open for new ideas and of course – for customers 🙂
No Comments