July 2025 – UPDATE
Due to changes in the Google Photos API, rclone is no longer able to download photos it didn’t upload itself, making this project a bit useless…
BUMMER! Still, it was a nice adventure 🙂
(Thanks David E for commenting!)
I have a Raspberry Pi. Actually I had more than one, but they all broke up… So now I have one Raspberry Pi.
It’s an old one, version B, but still works and can do some stuff.
I built a remote controlled car (with an android joystick, which is all here) but I took it apart in about a month.
Later, I tried building a Copter but boy oh boy was I naive..
For a few years I forgot about it, then I tried PiHole, used it as a Torrent Bay and more. But it was always a matter of weeks until I took it apart and moved it back to the drawer.
Until a month ago.
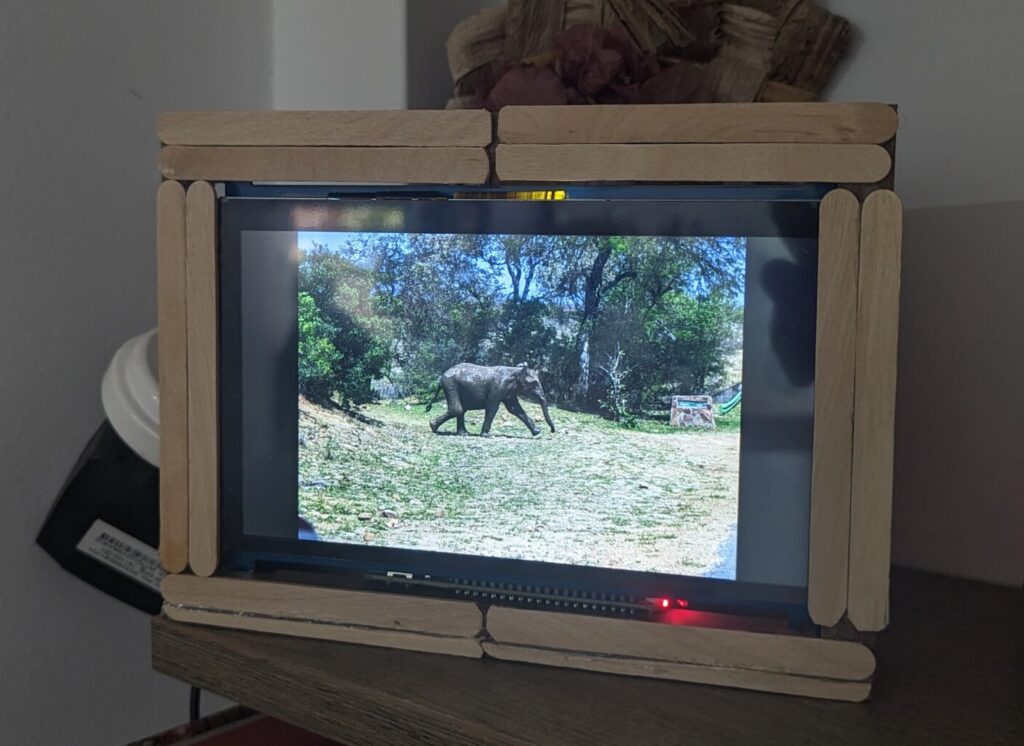
My wife and I wanted a digital frame for all the pictures from our vacations and wedding. Those pictures are on Google Photos. I searched for some digital frames but I couldn’t find one that we liked, was cheap enough and would work with Google Photos.
Then came the idea to make it with Raspberry Pi!
I couldn’t find a single manual for this and that’s why I thought about writing this one.
Enjoy!
Instructions
General configuration of the Raspberry Pi
- Install Raspbian OS on the Raspberry Pi and enable SSH
- Connect the Raspberry Pi to your network
We’ll use our PC for configuring the Raspberry Pi - Connect to your Pi using ssh (it should broadcast “raspberrypi” as its hostname)
ssh pi@raspberrypi
- Update the RPI
apt update
apt upgrade
Connect the screen to the RPI
- Follow the instructions of the screen for connecting it to the RPI
- It should be as easy as plug and play – HDMI to HDMI and the power to the RPI USB port.
- You now have a screen for the RPI!
Make it work as a Digital Frame
- Install feh, this is the software that will show the pictures on the screen as a slideshow.
sudo apt install feh
- Create a directory in your home folder with the name “GooglePhotos”. This directory will contain the pictures that “feh” will display
mkdir /home/pi/GooglePhotos
- Create a script file “slideshow.sh” in your home folder (“/home/pi/slideshow.sh”). This script will run on startup and execute “feh”.
touch /home/pi/slideshow.sh
- Write the following to it
#!/bin/bash
export DISPLAY=:0.0
xrandr --output HDMI-1 --rotate inverted
feh \
--recursive \
--randomize \
--fullscreen \
--quiet \
--hide-pointer \
--slideshow-delay 6 \
/home/pi/GooglePhotos/
Make “slideshow.sh” executable
chmod +x /home/pi/slideshow.sh
- Try it out! Run “./home/pi/slideshow.sh” and you’ll see the pictures on the screen.
Make it work on startup
- Write the following to “/home/pi/.config/lxsession/LXDE-pi/autostart” (create the file if it doesn’t exist)
@lxpanel --profile LXDE-pi
@pcmanfm --desktop --profile LXDE-pi
@xscreensaver -no-splash
@/home/pi/slideshow.sh
- Restart your RPI to verify it works!
reboot now
Make it work with Google Photos
For this, I made a simple trick. “feh” displays the images from a folder, not from Google Photos, so what I did was to use “rclone” to synchronize a specific album into that folder!
- Install rclone (you can follow these instructions for more information)
curl https://rclone.org/install.sh | sudo bash
- Configure rclone (you can follow these instructions as well)
rclone config
- Type “n” for new remote
- In “name” enter “googlephotos”
- In “Storage” enter “google photos”
- Leave “client_id” and “client_secret” empty
- For “read_only” enter “y”
- For “Edit advanced config? (y/n)” enter “n”
- Now rclone will use your browser to authenticate with Google. Enter “Y” for opening a browser. If that doesn’t work, try “N” or browsing “http://raspberrypi:53682/auth”
After you finish you’ll see a summary of your configuration, enter “y” to complete
Configure rclone with a specific album and folder
- Create an album in Google Photos for the frame. You can use an already existing album as well.
- Configure rclone to sync that album
rclone sync googlephotos:shared-album/<YourAlbumName> /home/pi/GooglePhotos/
- Verify the folder contains the images from the album
- For continuous update of the folder, I’ve added that command to the crontab
0 */1 * * * rclone sync googlephotos:shared-album/digital_frame /home/user/GooglePhotos/
That’s it! You have your very own Raspberry Pi Google Photos Digital Album (I need a better name…)
Comments: 2
The rclone command no longer works (July 2025) due to changes in the Google APIs
Thanks! I’ve updated the post.
It’s a shame!